
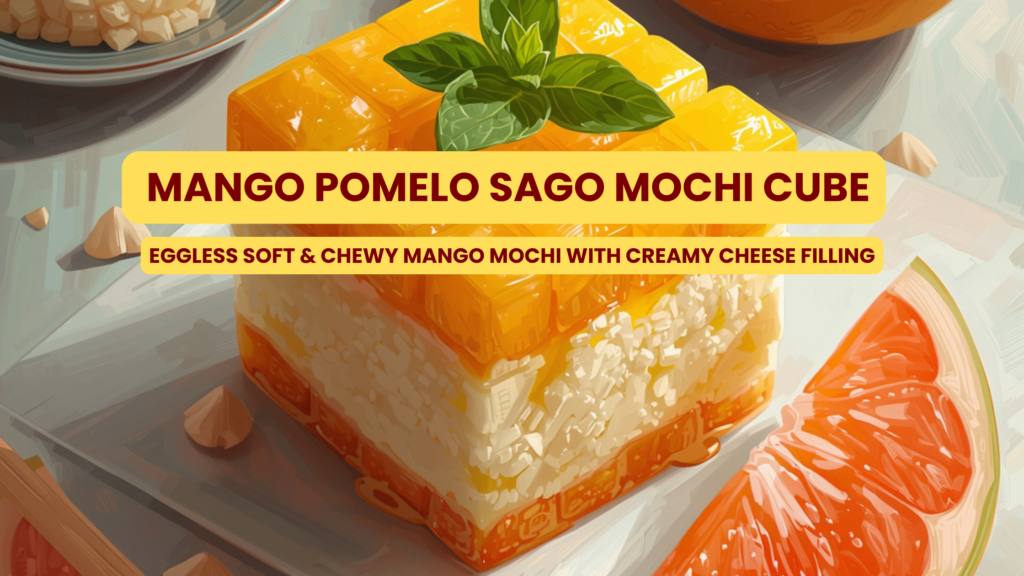
Mango Pomelo Sago Mochi Cube
If you enjoy soft and chewy desserts, this mango pomelo sago mochi cube recipe is worth trying.
Inspired by the classic mango pomelo sago, this version brings a creamy twist. Here, soft mochi wraps around a rich mango and cream cheese filling. As a result, every bite feels balanced and refreshing.
You get a dessert that is:
- Soft
- Creamy
- Refreshing
It’s eggless, refreshing, and perfect for summer. Even better, you can easily make this mango mochi recipe at home.
If you love mango desserts, you can also try our Mango & Black Pepper Mille-Feuille.
What Is Mango Pomelo Sago Mochi Cube?
At its core, this recipe focuses on texture and flavor. In one bite, you experience:
- A soft outer layer
- A rich and creamy center
- A fresh and light element
Because of this, the dessert feels balanced. At the same time, it does not feel too heavy.
Ingredients:
For Mochi Dough
- 1 tbsp butter
- 1 cup glutinous rice flour
- ¼ cup corn flour
- ½ cup sugar
- 1 cup milk
For Cream Cheese Filling
- ½ cup cream cheese (softened)
- ½ cup fresh mango puree
- 2 tbsp sugar (adjust to taste)
For Mango Pomelo Sago Layer
- ¼ cup cooked sago pearls
- ½ cup mango cubes
- ¼ cup pomelo pulp
- 2 tbsp condensed milk
For best results, use fresh and ripe mango.
Step-by-Step Mango Mochi Cube Recipe
Step 1: Prepare the Mochi Dough
First, mix glutinous rice flour, cornflour, sugar, and milk in a bowl.
Then, cook the mixture on low heat while stirring continuously. This helps prevent lumps and keeps the texture smooth.
After that, add butter and mix well. As a result, the dough becomes soft and easy to handle.
Step 2: Make the Cream Cheese Filling
Next, combine cream cheese, mango puree, and sugar.
Mix until smooth and creamy. Meanwhile, keep the mixture chilled so it firms up slightly.
Step 3: Prepare Mango Pomelo Sago Mixture
Now, combine sago pearls, mango cubes, pomelo pulp, and condensed milk.
Stir gently so the fruit pieces stay intact. Then, place the mixture in the fridge.
Step 4: Assemble the Mochi Cubes
Finally, take a portion of dough and flatten it.
Add the cream cheese filling in the center. After that, place a spoon of the mango mixture on top.
Seal it carefully and shape it into a cube. Also, dust with cornflour to prevent sticking.
Tips to Make Perfect Chewy Mochi Cubes
1. Use Fresh Mango for Best Flavor
Fresh, sweet mango enhances the taste naturally.
2. Don’t Overcook the Mochi Dough
Overcooking can make it too dense instead of soft and chewy.
3. Chill the Filling Before Assembling
This helps maintain structure while shaping.
4. Dust Generously
Mochi is sticky — corn flour is your best friend here.
In addition, avoid overfilling to keep the shape intact. Also, handle the dough gently to maintain its soft texture.
Storage Tips for Mango Mochi Dessert
Store the mochi in an airtight container.
Keep it refrigerated for up to 2 days. However, it tastes best when fresh.
Also, keep it covered to maintain moisture.
Why You’ll Love This Eggless Mochi Recipe?
If you enjoy trying new desserts, this recipe is a great choice.
Not only is it unique, but it also works well as a light summer dessert. Most importantly, it feels indulgent without being too heavy.
In fact, it’s simple enough for beginners to try at home.
How to make mango pomelo sago mochi at home?
To make mango pomelo sago mochi, prepare a soft mochi dough using glutinous rice flour, make a creamy mango cream cheese filling, mix mango, pomelo, and sago, then assemble and shape into cubes.
What does mango pomelo sago mochi taste like?
It tastes soft and chewy on the outside, creamy in the center, and fresh and juicy from mango, pomelo, and sago pearls.
FAQs: Mango Pomelo Sago Mochi
1. Can I make this recipe vegan?
Yes, use plant-based milk and vegan cream cheese.
2. What can I use instead of pomelo?
You can use grapefruit or skip it.
3. Why is my mochi too sticky?
Add more cornflour while handling or slightly reduce liquid in the dough.
Final Thoughts
At first glance, this dessert may look complex. However, the process is quite simple once you try it.
With its soft, creamy, and juicy textures, it stands out from regular desserts. Overall, it’s a recipe worth making at home.
Happy baking.
Disclaimer: This blog is intended for educational and informational purposes only. Results may vary depending on ingredients, equipment, and technique. Always follow safe baking practices and use caution when handling hot ovens, sharp tools, and food.