
Baked Churro Ice Cream Bowls
Let’s be honest: there is nothing quite like the smell of a warm, cinnamon-dusted churro at a fairground. But between the bubbling vats of hot oil and the inevitable messy cleanup, making them at home usually feels like a “maybe next year” project.
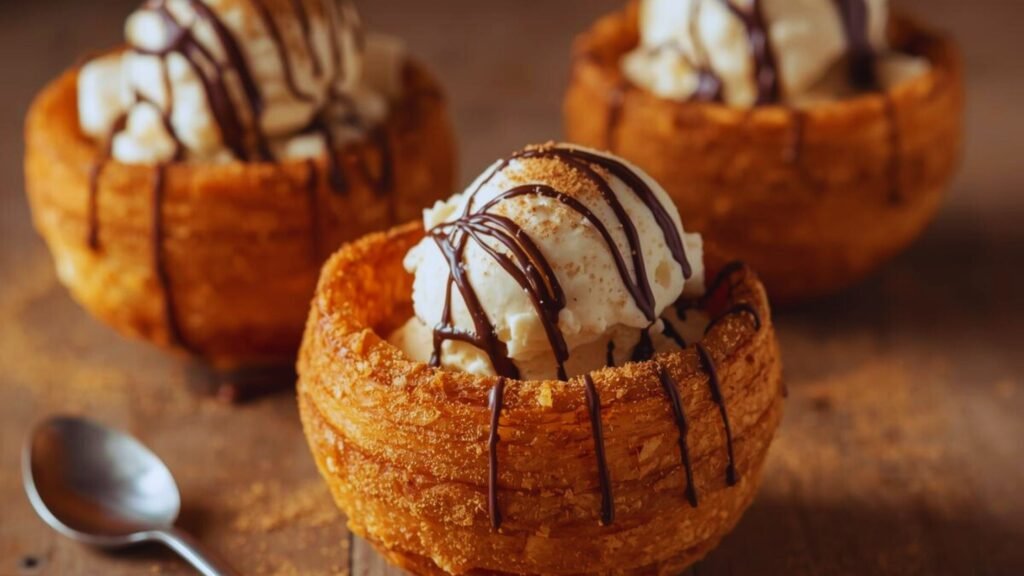
That’s where these Baked Churro Ice Cream Bowls come in. We’re taking that iconic flavor and turning it into a functional, crunchy vessel for your favorite sundae—no deep-fryer required. By using an upside-down muffin tin and a clever egg-free swap, you get all the golden ridges and spicy-sweet crunch of a classic churro with a lot less stress. Grab the vanilla bean ice cream; dessert is served.
Ingredients:
- 250 ml Water: Provides the liquid base for the dough.
- 115 grams Unsalted Butter: Adds richness and helps the dough rise and crisp.
- 2 tablespoons Granulated Sugar: Lightly sweetens the dough itself.
- 1/4 teaspoon Salt: Balances the sweetness and enhances the flavors.
- 125 grams All-Purpose Flour: The structural foundation of the pastry.
- 9 tablespoons Aquafaba (Chickpea Liquid): The perfect egg replacement to provide lift and moisture.
- 1/2 teaspoon Baking Powder: Added to the flour to ensure the bowls puff up without eggs.
- 1 teaspoon Vanilla Extract: Adds a subtle aromatic sweetness to the dough.
- 100 grams Granulated Sugar (for coating): Mixed with cinnamon for the classic finish.
- 2 tablespoons Ground Cinnamon: Provides the signature warm spice flavor.
Equipment:
- Standard Muffin Tin: Used upside down to shape the bowls.
- Large Piping Bag & Star Tip: To create the traditional ridged churro texture.
- Medium Saucepan: For cooking the dough (panade).
- Wooden Spoon or Spatula: For stirring the heavy dough.
Instructions:
1. Prepare the Equipment
Preheat your oven to 200°C. Flip your muffin tin upside down and thoroughly grease the outer bottoms of the cups with non-stick spray or butter.
2. Make the Dough
In a medium saucepan, combine the water, butter, 2 tablespoons of sugar, and salt. Bring to a boil over medium-high heat. In a small bowl, whisk the baking powder into the flour. Once the liquid is boiling, reduce the heat to low and add the flour mixture all at once. Stir vigorously until a ball forms and pulls away from the sides of the pan (about 2 minutes).
3. Cool and Incorporate Egg Replacement
Remove the pan from the heat and let the dough cool for about 5–10 minutes (it should be warm, not hot). Add the aquafaba 3 tablespoons at a time, beating vigorously after each addition. It may look like it’s separating at first, but keep stirring until the dough becomes smooth, thick, and glossy. Stir in the vanilla extract.
4. Pipe the Bowls
Transfer the dough to a piping bag fitted with a large star tip. Starting at the base of an upturned muffin cup, pipe the dough in a continuous spiral around the cup until you reach the top edge, forming a bowl shape. Repeat for all cups.
5. Bake
Bake for 20–25 minutes or until the bowls are golden brown and firm. Pro Tip: Do not open the oven door early, as the steam is what keeps the bowls from deflating!
6. Coat in Cinnamon Sugar
While the bowls bake, mix the 100 g of sugar and cinnamon in a small bowl. Once the churro bowls are out of the oven, let them cool for 2 minutes, then gently lift them off the tin. While still warm, toss them gently in the cinnamon sugar mixture until fully coated.
Tips for Success:
- The Ultimate Sundae: Fill the cooled bowls with a large scoop of vanilla bean ice cream, chocolate sauce, and whipped cream.
- Preventing Sogginess: If you aren’t serving them immediately, wait to fill the bowls until the very last second to maintain that signature crunch.
- Storage: These are best eaten the day they are made. If they soften, refresh them in a 180°C oven for 3-5 minutes to bring back the crispiness.
Also read: Decadent Delight: Homemade Chocolate Ice Cream
Note:
These baked churro bowls offer a lighter, easier, and vegan-friendly (if using plant-based butter) alternative to traditional street food. By using the baked method, you get a beautiful golden vessel that is sturdy enough to hold your favorite frozen desserts!
Disclaimer: This blog is intended for educational and informational purposes only. Results may vary depending on ingredients, equipment, and technique. Always follow safe baking practices and use caution when handling hot ovens, sharp tools, and food.